Hey there wonderful people,
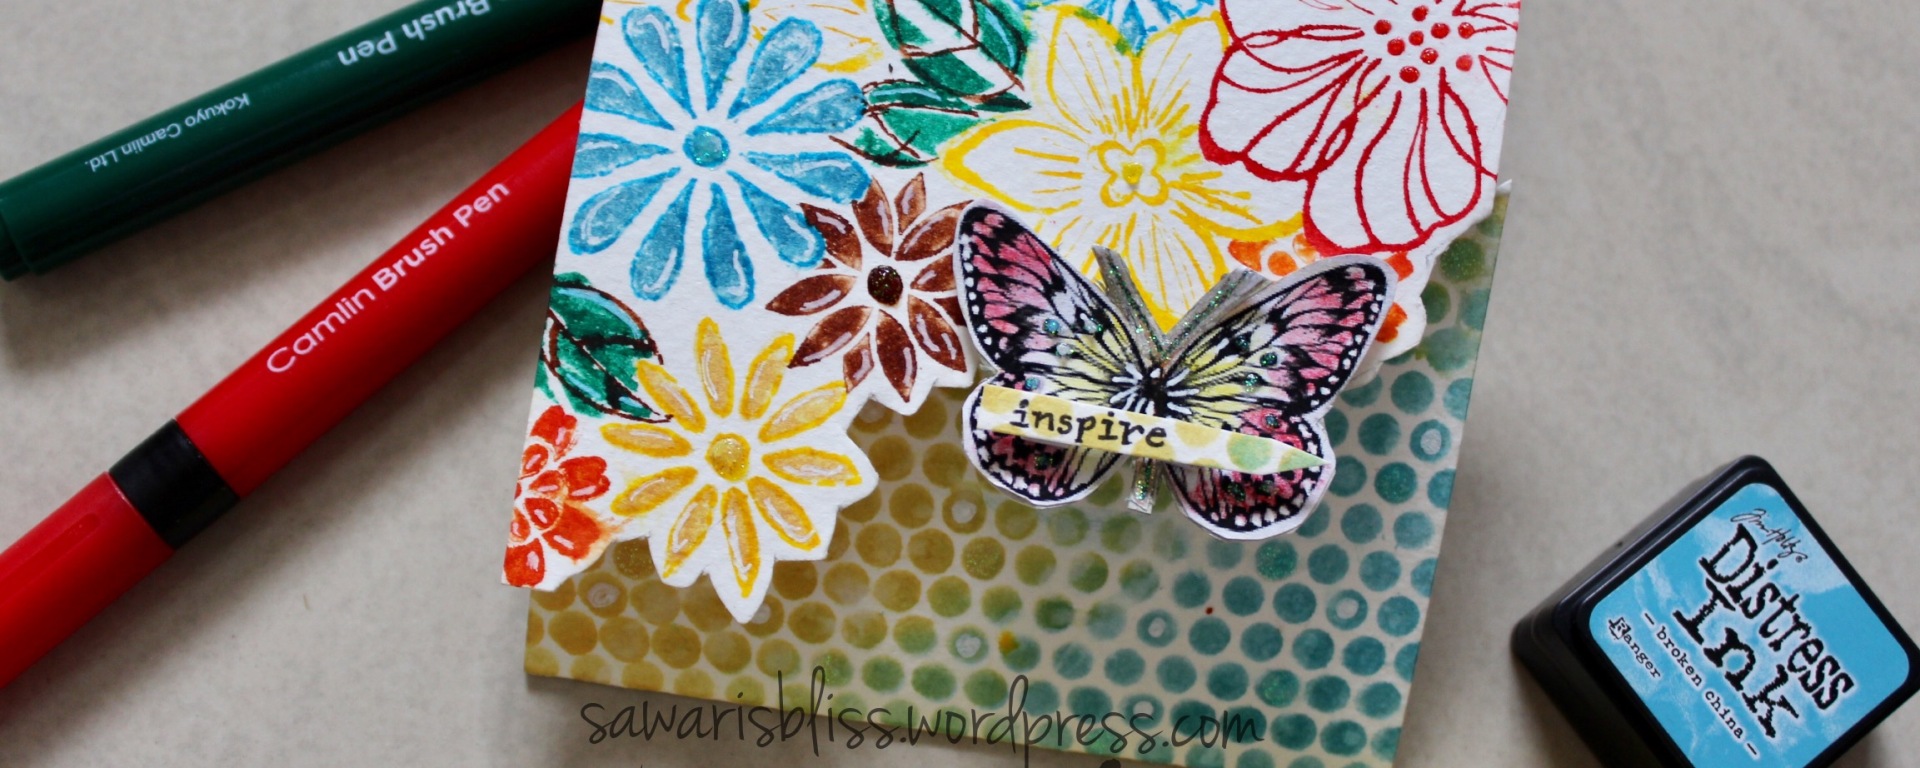
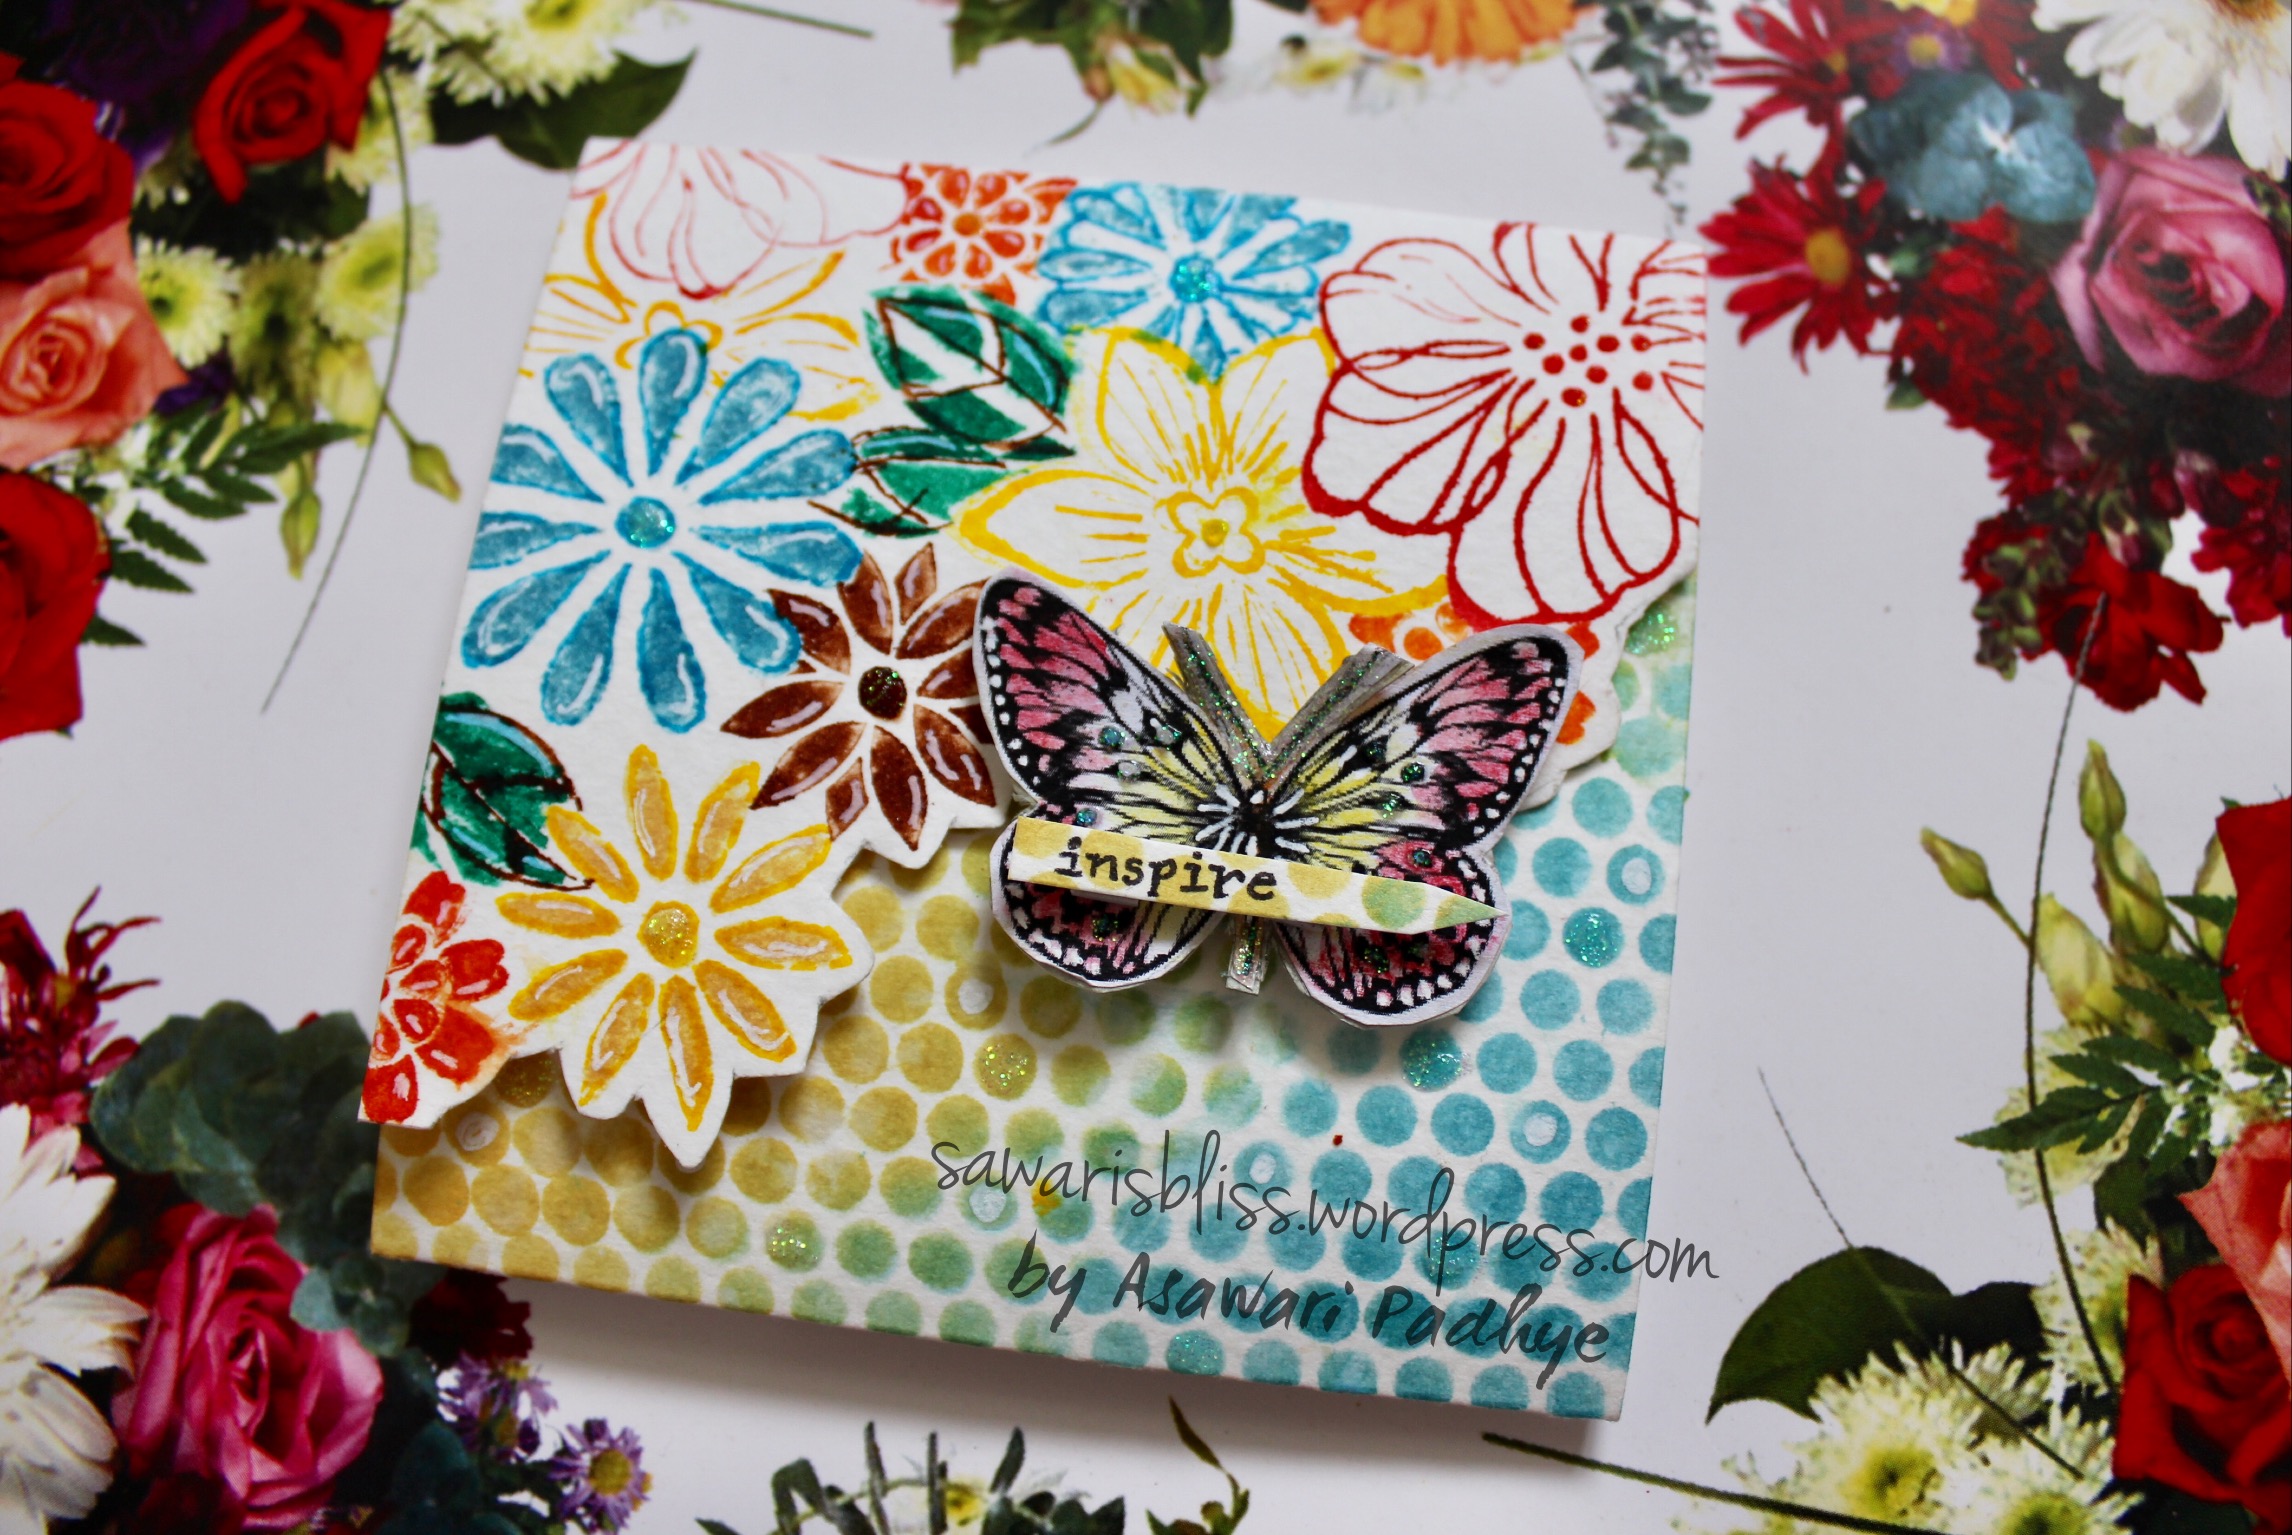
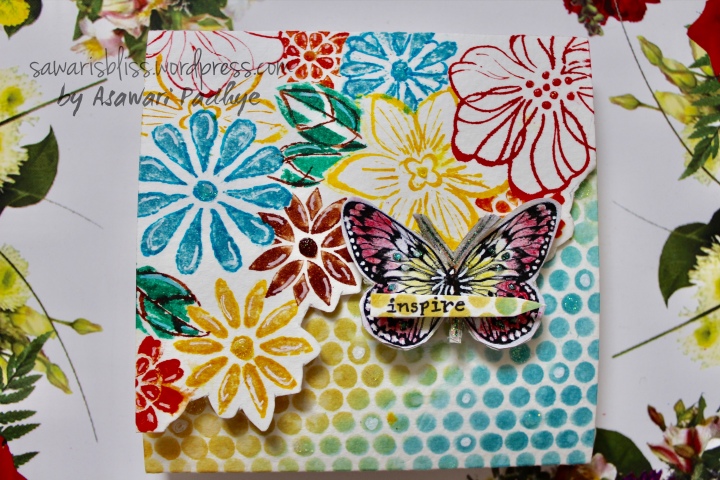
Hope you are doing well. I have brought another card for you today, which is just as bright as we all combined together! Once again, it is inspired by various challenges. I will list the challenges and the elements inspired from each of them down below. Here is the preview of my finished card:
Inspiration
I had decided to have a flower arrangement on the bottom half of my card while the otherwise plain upper half was just going to have some rained down watercolor texture. Then after watching what seemed like hundreds of videos from the various blog hops currently running, I was inspired to try something new; an unusual touch. So I decided to convert my clean and simple card into a gatefold card with prints on both the folds.
Layout
I have added new Brustro watercolor paper to my stash now (craft-supplies-shopping-urges :p ). I cut one of them in 4” x 11” size. Then I marked and scored it at 3.5” from both the ends of the longer side, folded to the opposite side so that it created two overlapping flaps on the front.
Stamping with masking
I sketched a rough outline to stamp my flowers on one of the flaps and then I stamped them with Ranger’s distress inks and Camlin watercolor brush pens. While stamping flowers I wanted to have an overlapping effect. I tried out the masking technique from this blog post by Jennifer Mcguire. Every time I stamped a flower, I also created a corresponding mask by stamping it on a simple piece of paper and then fuzzy cutting it exactly to the shape. Then if I wanted to stamp another flower that seems to be partially hiding underneath, I adhered the mask (with a rolled up masking tape on its back) on the top flower and stamped the hiding flower such that some of its part would be stamped onto the mask. This created the overlapping effect. I did the same with a couple of leaves as well, each time covering the nearby already stamped elements with their respective masks. I have stored these masks along with the stamp set for future use. Here you can see the overlapped flowers:
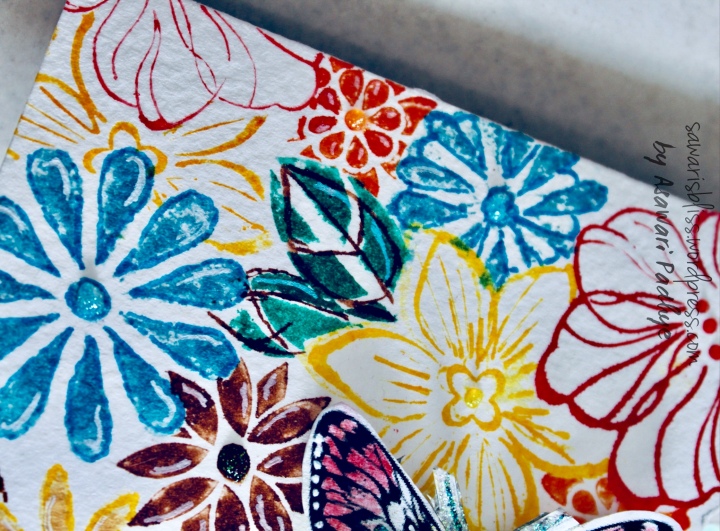
I drew a final combined outline of these flowers and then fuzzy cut it to create one of the opening edges of the card.
Second fold
Next step was to work on the other flap. Instead of watercoloring I went with distress inks here as I wasn’t completely satisfied playing with them yet 😉 . I used Mini Punchinela stencil to cover the whole area with distress inks, Broken China and Scattered Straw. This edge of the card was cut in a different shape than the earlier one. But I made sure to cut both the flaps in such a way that they would still overlap a bit. Here is the second edge after cutting:
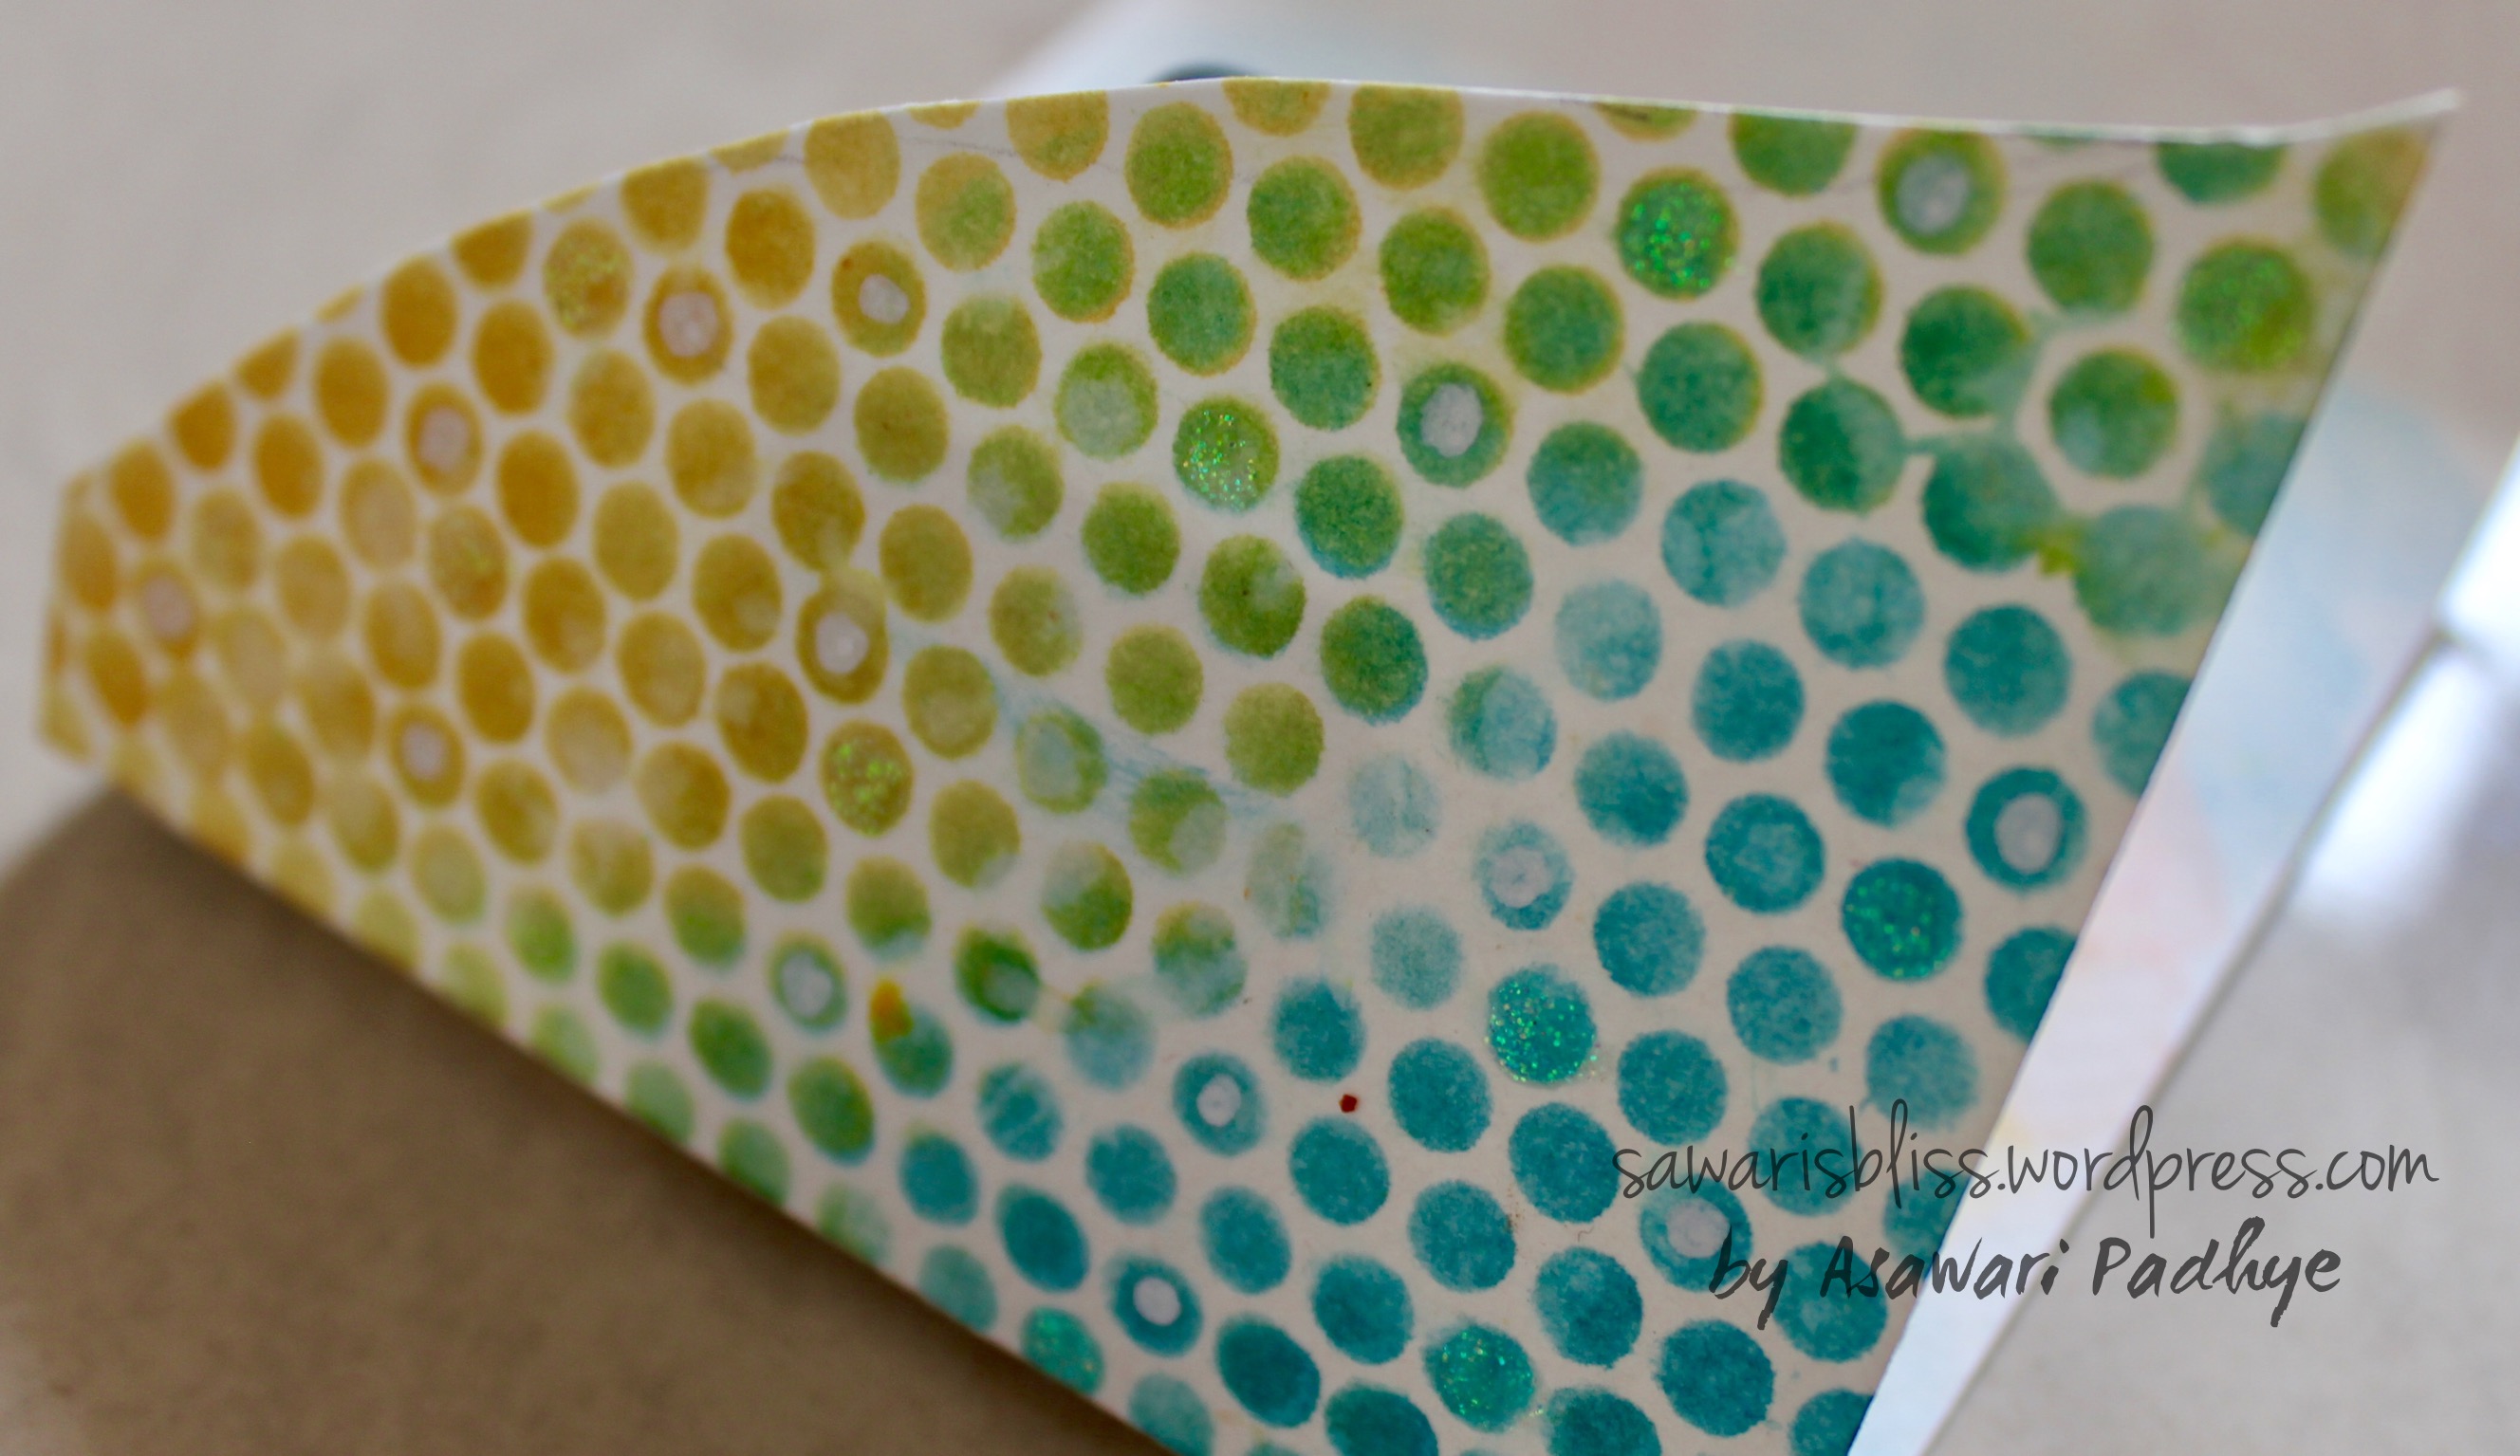
I now decided the orientation of my card. The flowers would go to the top while the inked circles would serve as the background bottom flap.
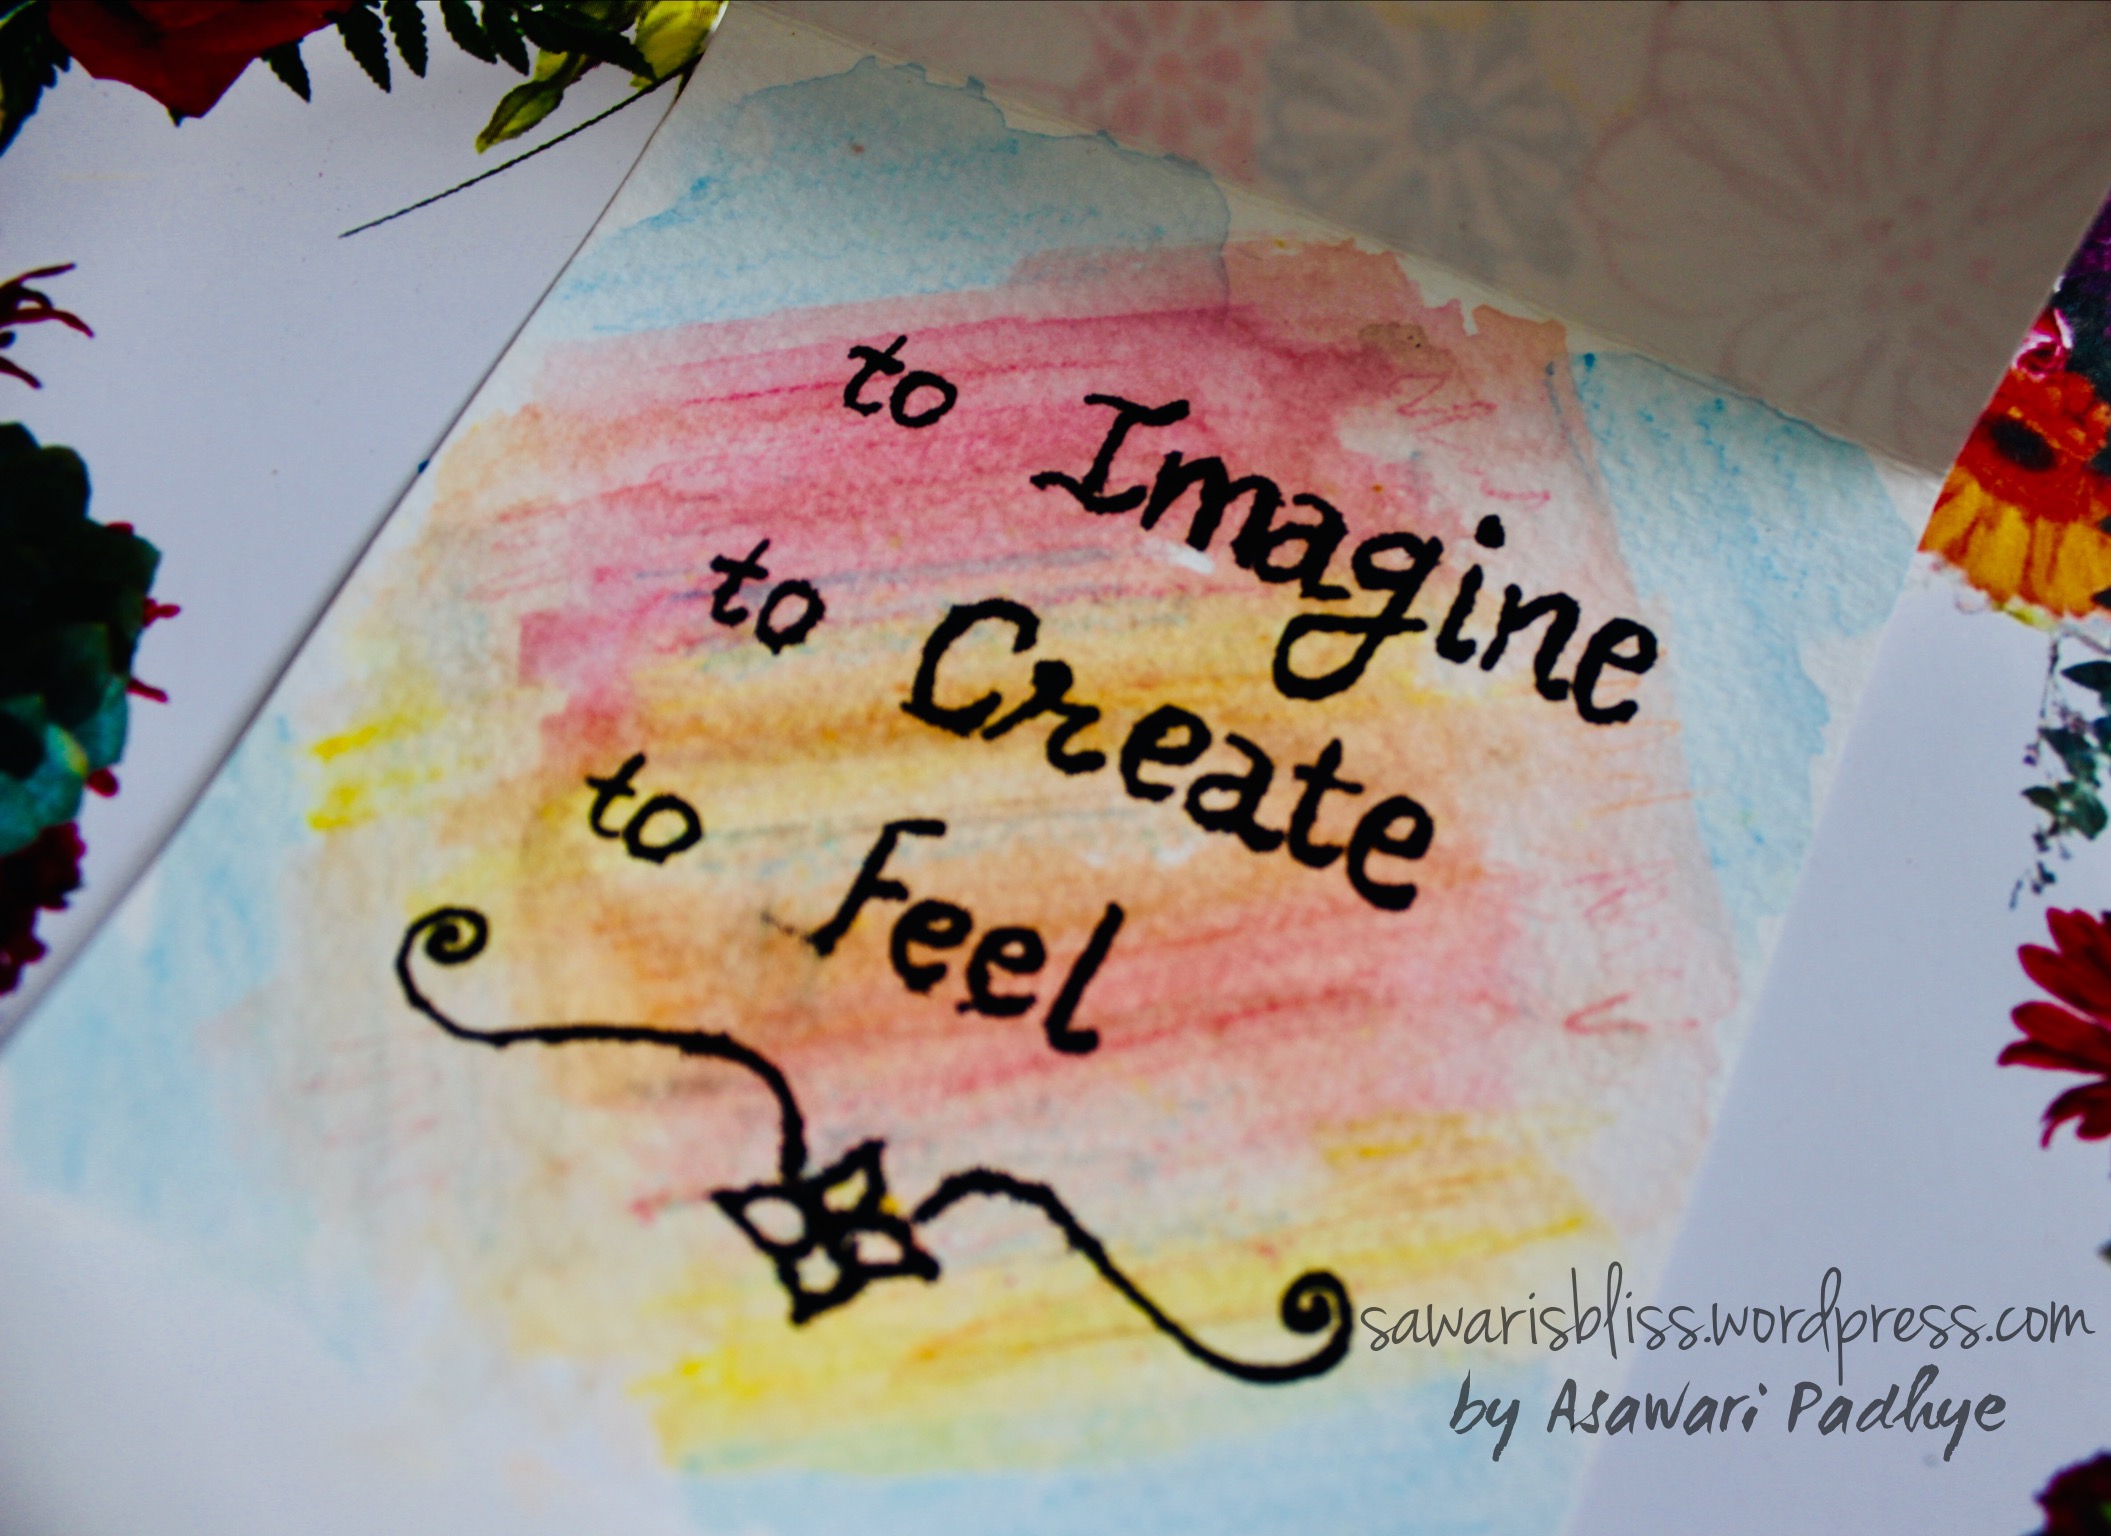
Inside the card
To make the inside of the card subtle, I simply rubbed my Staedtler watercolor pencils in different colors one below the other and used generous amount of water to move the color with a brush. I wasn’t going for bright or dark image but I certainly wanted all of my shades from the front side to slightly appear on the inside. The whole sentiment would read “inspire to imagine, to create, to feel” with only “inspire” on the front side. I used Faber Castell PITT Artist black pen to write the sentiment and draw a little doodle inside.
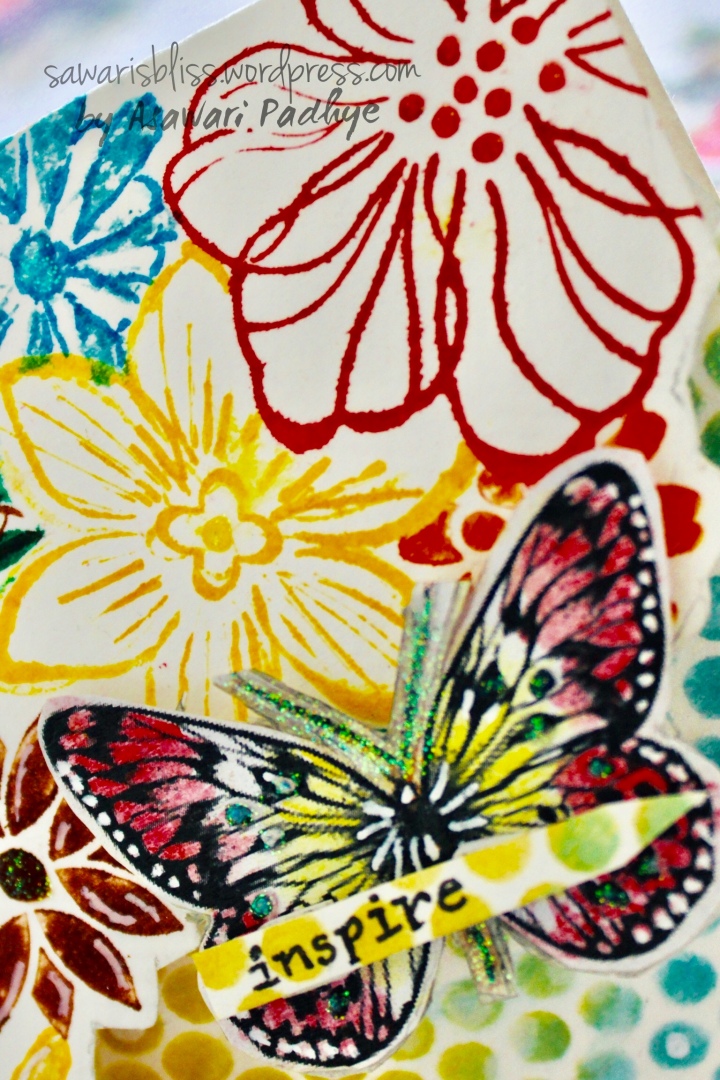
Butterfly
While it was drying, I filled in colors to a butterfly that was already available in my stash of printed images. I applied red and yellow watercolor pencils only at the corners of her wings and used a wet paintbrush to move the colors just a little towards the inside area. I adhered it onto a piece of the same watercolor paper and fuzzy cut it along the shape. I glued the butterfly on the edge of the flowers. I made sure to place the foam tape only at the upper part of the wings so that the butterfly won’t stick to the bottom fold. A small piece of the scraps that was remaining after cutting the bottom flap served as a nice background for the word “inspire” that I wrote with Faber Castell pigment 0.5 mm fineliner.
Finishing touches
Finally some highlights with white gel pen and Camel 3D glitter and my card was ready. 🙂
Heartfelt thanks to Jennifer Mcguire (whom I have started following religiously) and Nina-Marie. These talented ladies inspired and taught me the smart ways to build this layout. Of course there are numerous videos available on YouTube (many more from Jennifer Mcguire herself) demonstrating different versions and sizes of gatefold cards but I designed my version based on the guidance from these two videos.
Although this was my first attempt at masking, overlapping, gatefold etc, I was happy to see how it turned out. I guess the credit goes to vibrant colors! Hope you enjoyed stepping inside this “flowery” gate. I would love to read your opinions in the comments below or on my social media.
Till the next inspiration strikes…
Love from,
Asawari
I am entering this card for:
- HLS August Watercolor challenge (anything goes + flowers)
- Butterfly challenge with letter F (flowers + folds more than 1 + ferrari red)
- Three Amigos challenge #17 (May flowers)
- HLS August Mixed Media challenge (words)
- Simon Says Stamp Wednesday challenge (distress it)
- MFT Sketch challenge #397 (sketch)
- Your Next Stamp Sketch and Color challenge #95 (colors)
- Inkspirational challenge #167 (popsickle photo – colors)
- Word Art Wednesday challenge weeks 346-347 (anything goes)
- Creative Artiste challenge #41 (anything mixed media goes)
- A Bit More Time To Craft challenge #73 (anything goes)
- 613 Avenue challenge #212 (anything goes)
- More Mixed Media challenge (anything goes + brights)
- Craft Stamper Magazine August challenge (anything goes + stamping)
- Penny’s Paper Crafty challenge #392 (anything goes + dt)

Lovely combination of elements!
Thank you for sharing with Happy Little Stampers!
Susan
DT for Mixed Media
Calling All Crafters! – My personal Blog!
LikeLike
Thank you for entering in the Happy Little Stampers August Watercolour Challenge. Your card is lovely, fantastic gatefold design.
LikeLiked by 1 person
Sorry it is Happy little stampers mixed media challenges
LikeLike
Awesome card with rich colours. Thank you for joining us at Held mixed media challenge.
Shylaa DT
LikeLiked by 1 person
So colorful, bright and happy looking! I love all the detail you’ve added to your card and this must have taken very long time to make… Great job, very artsy! Thanks for joining us at Inkspirational!
LikeLiked by 1 person
Wow! so much colour here and lots of inking. What a fabulous finish. Thanks for sharing at HLS this month.
LikeLiked by 1 person
A fabulous card. Lovely design and colours.
Thank you for joining in with our August challenge “Anything Mixed Media Goes” at >Creative Artiste Mixed Media. Good luck x
LikeLiked by 1 person
Wow! Another gorgeous creation! So happy I get to see them! Thanks so much for linking up to Three Amigos and playing along with our May Flowers Challenge!
LikeLiked by 1 person
Wow… this is beautiful! So much color layered into this design… I really like how the flowers overlap the polka dots and it is all topped of with a gorgeous butterfly! Thanks for playing with us at Inkspirational!
– Shauna
LikeLiked by 1 person
Hello Aswari, welcome to my butterfly challenge. I don’t think that you have played before. I love your unusual gatefold design. Very inspirational and wow to all those vibrant colours you have used. Thankyou for coming and spinning the butterfly wheel with me this week. Hugs Mrs A.
LikeLiked by 1 person
yes…this is my fist time on your challenge. I liked the theme. so this time I particularly made one for this challenge. 🙂
LikeLike
Asawari, thank you so much for sharing your project and creativity at 613 – I really like the different approach you have used to the gatefold! I love the colors you chose to use and especially like the two different designs combining the geometric circles with the floral… really nicely done with a beautiful result!
~ginny, DT for 613 Ave C
RubberMAD (GettyCollection.com)
LikeLiked by 1 person
This is such a creative card. I love the way it opens. The flowers are beautiful! Thank you for joining us at Simon Says Stamp Wednesday Challenge. Good Luck.
♥ Mindy
LikeLiked by 1 person